
TABLE OF CONTENTS
WHY BOTHER WITH TANNOY GRF
Having finished upgrading my Tannoy Monitor Gold 15″ drivers meant that I was ready to build them some enclosures. As an initial test, I put the drivers into non-optimised 110 litres bass reflex cabinets. I was very surprised when I played music for the first time. These drivers went really low and sounded extremely good. I was surprised because when I was simulating response using T&S parameters they didn’t look like they were going to cause an earthquake.
Following a rather promising initial tests, I have decided to build replicas of Tannoy GRF horn-loaded enclosures from 1960s. I always liked the look of them, especially with the covers on – they are actually not many speakers that look good with the grilles on, but these do indeed. I knew that it will not be easy due to internal panels joining at ‘funny’ angles, but making GRF enclosures looked much simpler than making Westminsters…
PLANNING
To save time and limit additional expenses I always try to follow the common proverb: “measure twice, cut once”. With fairly complicated constructions, such as Tannoy GRF, it is essential to plan everything and think about methods of doing things before attempting any work. I started from doing research on the internet and downloading any available enclosure plans. I found some drawings with measurements that looked like original Tannoy GRF drawings. There were couple of measurements that were unclear, therefore, I drew the enclosure cross-section in 1:1 scale and calculated missing dimensions using commonly know mathematical formulas. Drawings were then re-scaled to allow for usage of 25mm plywood instead thinner ply used in original drawings (length, width, depth and expansion of the horn were kept as per the original plans). Driver performance in Tannoy GRF enclosure was then simulated using HornResp software. The results did not look too promising in terms of deep bass. However the results did not look too promising when I simulated 110l Bass Reflex enclosure but sounded very nice, so I decided to progress with the project.
Methods of joining wood may have impact on the size of the panels, so it is always important to consider these first. Different methods were considered, but too keep it simple and to avoid using screws, wooden dowels were chosen. All cuts were planned to ensure most efficient use of the material.


ENCLOSURE BUILDING
Tannoy GRF wood cutting proven to be a lot more difficult than I originally thought. I am not a carpenter and I was intending to hire a professional to do the difficult angle cuts for me. I approached many different carpenters and wood merchants in my town and none of them wanted to do it, despite the fact that they had really good equipment! Fed up with that, I decided to do it myself. At the time I lived in a small flat, so I had to do all of the cuts in my friend’s back garden, using a circular saw… Despite this inconvenience and lack of table saw, the results were surprisingly good. Router was used to cut flush mounts for the drivers and speaker terminals. It was also used to round all of the internal horn edges.


Once all of the cuts were complete, the boards were brought back to my apparent. Thick cardboard jig was used to align the dowel wholes on the enclosure sides with the dowel wholes on the horn panels. What seemed to be a good idea in theory, proven to be a little bit more tricky in practice – nothing that a bit of sanding would not fixed though. Small neodymium magnets were fitted into speaker front panels as well as the grills, to hold them in place. All gaps were filled with silver sand. Tannoy GRF enclosures were glued together, leaving one side panel unglued, to allow for adding or removing damping material. Initially damping material was only placed in compression chamber and first part of the horn.


INITIAL LISTENING TESTS
The most exciting part. Well, I thought it would be… my first impression wasn’t great. The upper bass was really boomy and there was very little of the really deep bass. The tonal balance was just strange, and not right to my ears. I experimented with more damping material, and ended up with the whole horn throat (except the exit) dampen with felt. This have greatly improved the total balance and speakers started sounding more acceptable, more balanced. Nevertheless, they were still lacking this very deep bass, which I knew well that these drivers were capable of reproducing. Most of my favourite recordings sounded OK but I was not blown away. The only time when the Tannoy GRF enclosures impressed me, was when I listed to Carl Orff – Carmina Burana. The power and speed of the lower registers was just overwhelming – never heard anything like this before.
CONVERSION INTO BASS REFLEX ENCLOSURE
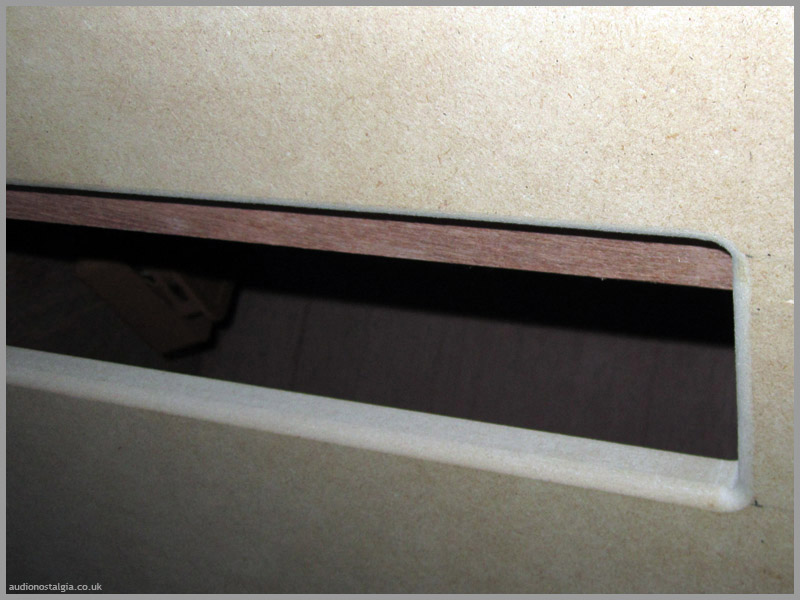
I was not willing to keep these refrigerator size Tannoy GRF enclosures and be unhappy with lack of deep bass. For this reason I decided to convert them into Bass Reflex enclosures. The procedure turned out to be more difficult than anticipated as the horn panels were already glued into one side of the enclosures. The port size was calculated based on drivers’ T&S parameters and desired tuning frequency. Plywood leftovers were used to seal most of the horn throat exit, leaving only narrow and long gap, which acted as the previously calculated bass reflex port. Most of the inner panels were covered with 10mm felt, the rest were covered with loudspeaker wadding.
The enclosures were stained using Van Dyck Crystals – a traditional and natural water-based wood dye made from walnut husks. These give a lovely walnut colour but but do not protect the wood. The plan was to use cover these with a clear lacquer but I never got around to it.
Speaker grilles were constructed to look like the original grilles from Tannoy GRF Rectangular, but they were adjusted accordingly to accommodate the bass reflex port. The grilles were covered with vintage speaker cloth (not cheap but looks lovely) and the original Tannoy logos were attached to them.


LISTENING TESTS
After the initial tests with bass reflex enclosures I knew what to expect, and I was not disappointed. Sound was nicely balanced, and the deep bass was there when it needed to be there. Don’t get me wrong, I can appreciate many more things than deep bass, but I had certain expectation from these massive bass reflex enclosures, and these expectations were not only met, but exceeded. The bass was deep but well controlled. Meaty but not boomy. Precisely how I wanted it! Tracks like Dire Straits – Water of Love or Alice In Chains – No Excuses (Unplugged) were taken to the whole new level. I’m talking about bass as this is where the large enclosures for vintage Tannoy drivers impact the sound the most. They of course affect the other important aspects like tonal balance, sound dispersion, warmth of midranage and many other things, but the bass extension IMHO is where the biggest audible difference is. Enough about bass extension though! These speakers reproduce voices, saxophones and double bass extremely well and if you are interested in my views on the sound of these, please read my review of the Tannoy Monitor Gold drivers.
LIST OF COMPONENTS & PRICES
Table below shows list of parts together with prices, necessary to build the Tannoy GRF enclosures as described above. The prices of the items listed below were correct at the time of writing this article.
| Total Time: | 60h |
| Total Cost: | £285.46 |
| Item | Details | Unit | Qty | Price Per Unit | Total Price |
| Plywood For Enclosures | 2440 x 1220 x 25mm | Board | 3 | £49.15 | £147.45 |
| MDF For Grills | 1220 x 1218 x 15mm | Board | 1 | £11.10 | £11.10 |
| Wooden Dowels | M8 x 40mm | Pack | 3 | £2.28 | £6.84 |
| Ronseal Wood Filler | 50ml | Can | 1 | £3.66 | £3.66 |
| Wood Adhesive | 500ml | Can | 2 | £5.83 | £11.66 |
| Van Dyck Crystals | 500g | Pack | 1 | £6.95 | £6.95 |
| Allen Bolts | M6 x 50mm | Pack | 2 | £1.66 | £3.32 |
| Captive Nuts | M6 x 12.3mm | Pack | 2 | £1.23 | £2.46 |
| Brass Flat Washers | M6 | Pack | 1 | £2.20 | £2.20 |
| Speaker Terminals | Gold Plated | Pair | 1 | £7.57 | £7.57 |
| Neodymium Magnets For Grills | ø6mm | Pack | 1 | £4.25 | £4.25 |
| Vintage Speaker Cloth | – | Piece | 2 | £18.00 | £36.00 |
| Felt | 2400x1220x10mm | Sheet | 1 | £26.00 | £26.00 |
| Wadding | 1x1m | Piece | 2 | £8.00 | £16.00 |
| £285.46 |
FINAL THOUGHTS
Tannoy GRF project was one of the most intricate DIYs I have ever attempted. However, if I was going to build the horn enclosures again, it would actually make sense to build these from 19mm plywood as per the original specs. From what I understand, horns are not affected by vibrations in the same way as bass reflex enclosures, hence, the maximum rigidity is not the most important factor. At the time, I thought ‘thicker is better’ and I went with 25mm plywood instead, which added an extra work or recalculating the enclosure size to maintain the horn throat. In addition, it would have been a good idea to purchase a better grade of plywood (i.e. birch plywood) to achieve nicer finish.
One more thing – at the time of building these, I did not have the measuring equipment that currently do. Consequently, I was not able to measure what the Tannoy GRF enclosures did, and I was not able to compensate for it at the crossover level. I have a feeling that the crossovers that came with the Tannoy Monitor Gold drivers were only supposed to be used with sealed and bass reflex enclosures. The crossovers used in horn enclosures were most likely different/modified crossovers.
Completed: September 2012 | Published: November 2014