TABLE OF CONTENTS
BEST STANDS FOR HARBETH SPEAKERS?
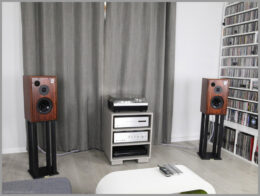
Having bought the Harbeth M30.1 speakers, I wanted to ensure that the tweeters were at the right height – i.e. on axis. In my case, when I slouch on my sofa (read: normal listening position) my ears are at 950mm from the floor. The tweeter of the Harbeth 30.1 is 320mm from the bottom of the speaker, which for my circumstances gives a stand height of 630mm. Most off-the-shelf speaker stands are either 600mm or 700mm, so not exactly what I wanted.
I reviewed various forums to see what other Harbeth owners use with their speakers. The research revealed that a lot of people seem to like open top/open frame stands, with minimal point of contact between the speaker and the stand. The suggestion is that the minimal contact area reduces transfer of low level vibrations, and possibly, present less surface area for reflections. For those not familiar with Harbeth speaker design – the enclosures are made of relatively thin walls, tuned to move any enclosure resonance to a desired frequency. But back to the stands…
There is a UK based company called Something Solid that manufactures bespoke metal open top/open frame Harbeth speaker stands, and a number of Harbeth owners use them. Although I like the idea behind the design, I don’t find these stands aesthetically pleasing, and consequently, I would not be able to put up with them in my living room. There is another UK based company called HiFi Racks, who makes bespoke speaker stands from solid wood. These are not an open top construction, and I’m not too keen on their look either, not to mention the eye watering price.
Not being able to get what I wanted and having gathered some woodworking experience over the years, I decided to design and build the stands myself. My criteria were: correct height, wooden construction, aesthetically pleasing and possibly open top/open frame design.
PLANNING
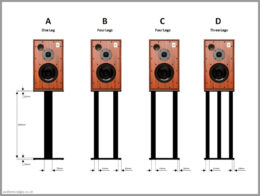
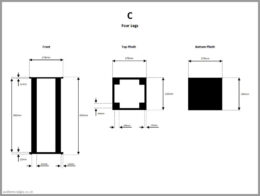
With the aid of Photoshop, I mocked up some potential designs for my Harbeth speaker stands. Visually, I prefer it when the bottom of the speaker stand has the same size as the top. As you can see in the first image below, I considered various designs with differing leg numbers and placements, as well as different leg widths. Out of these ideas, I found version C to be most aesthetically pleasing. However, before proceeding with the work, I mocked the stand using scrap pieces of chipboard, to ensure that was going to like the look in real life. I varied how far the legs should be from the edge of the stand, and ended up settling on 16mm before going ahead with the project.
Due to the stand legs being quite far apart from each other, I was also able to “open” the top of the Harbeth speaker stands, to create something that reassembles open top/open frame designs. Because I already had some birch plywood in storage, I used 12mm thickness pieces for the stand tops and a 15mm thickness for the bottom. The only thing that I needed to purchase was the timber for the legs. I considered going for hardwood, but I decided that a planed softwood would be more than adequate. I may be upgrading my sofa in the near future, which is most likely going to raise my listening position. Once the new sofa is in place, I may have to make some longer legs and I will possibly consider the hardwood then.
BUILDING STANDS FOR HARBETH 30.1
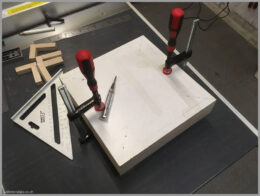
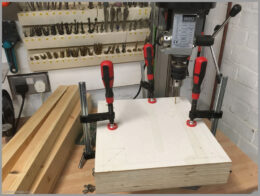
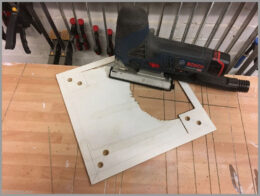
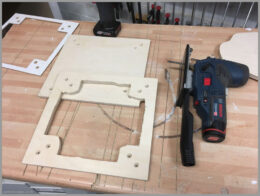
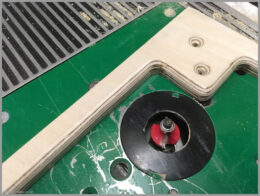
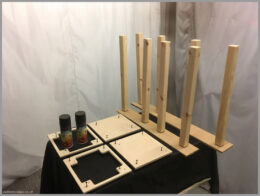
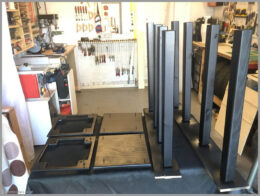
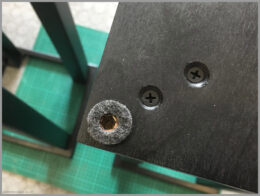
Cutting out the middle of the Harbeth stand tops created additional complications, especially if it was to be done neatly. I decided to create a jig from 3mm hardboard (visible on the photos below), that would later allow me to follow it with a router. I also created 16mm L-shape spacers, to aid with stand assembly. The jig was cut to size on a table saw at the same time as tops and bottoms. All of these were clamped together and the jig’s surface was used to mark placement of the mounting holes as well as cutting lines for the open tops. Mounting holes were drilled through and countersunk using a bench drill. Edges of the tops and bottoms where rounded off using my router table with bearing guided rounding-over bit.
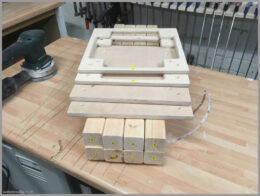
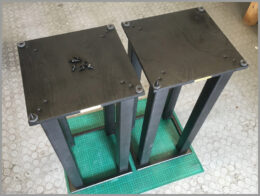
Previously purchased 44x44mm planed square edge timber was cut to the correct lengths, ensuring that all of the cuts are perfectly straight. Legs were placed between the tops and bottoms and correctly aligned using the L-shape spacers. Pilot holes were drilled in the legs, and then, the Harbeth speaker stands were assembled to ensure that everything fitted as I intended.
Mounting holes in the jig were countersunk and the inside of the jig was carefully cut out using a jigsaw. All of the edges were sanded to ensure straightness and a smooth finish. With the jig ready, the cut out area was marked on the actual tops, and roughly cut out using my jigsaw – close enough to the jig’s edges to ensure that the router bit would only have to cut wood on one side. The jig was placed on the stand top and attached to my work bench using wood screws. A guide bush was attached to the router, together with a straight router bit. The shape of the jig was followed with the router in a couple of passes, each slightly deeper, with the last pass marginally cutting into my sacrificial work bench :).
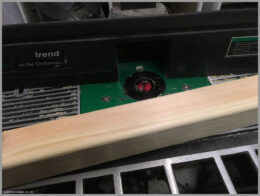
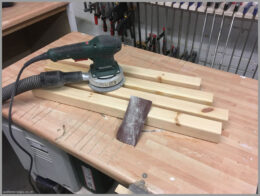
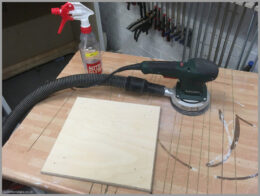
My router table with rounding-over bit fitted was used to round off the internal edges of the open tops, as well as the edges of the legs. Surface imperfections were filled in with fine wood filler. All of the parts were slightly dampened with water (in order to raise the grain) and then sanded using 120 and 240 grit sandpapers, with the aid of random orbital sander.
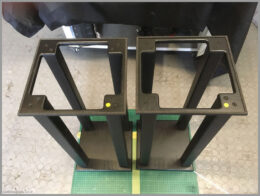
The components were marked and prepared for spray painting. Two cans of black matt spray paint were used to create a satisfying finish. Painting directly onto wood shows its texture and imperfections (i.e. knots) but this was the effect that I was trying to achieve. Both Harbeth speaker stands were assembled with the help of the previously mentioned L-shape spacers.
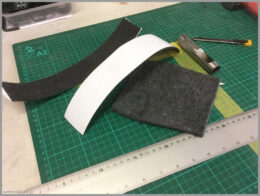
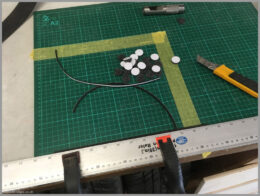
Because we only have hard floors in our house, I decided to place my Harbeth 30.1 stands on felt feet instead of spikes. The feet were hole punched from 5mm felt and attached to the stands using double sided tape. I also wanted to ensure that my precious Harbeth M30.1 speakers do not sit on a slippery surface, and decided to run a narrow strip of thin neoprene around the perimeter of the stand tops. This not only makes it harder for the speaker to slip off, but also reduces the contact area between the speaker and stand.
Anything built from scratch takes time, a lot of time! Especially if you are as fussy about aesthetics and finished quality as I seem to be. In this instance, the whole process took a total of 14h but as is usually the case with any project, you would not be able to tell this by looking at the stands…
You don’t need all of the tools that I used to make these, so don’t let that discourage you from building your own stands. Having access to various power tools makes it easier to achieve good results in a shorter amount of time, however, you can get equally good results with a quite simple tools, although you may need to put in more time and a bit more elbow grease.
LIST OF COMPONENTS & PRICES
The table below contains a list of the parts together with prices, necessary to build a pair of stands for Harbeth Monitor 30.1 as well as newer models. Some of the components that were already in my possession are not on this list (i.e. double sided tape, etc.). This stand design can be used for other Harbeth speakers stands, but in this case you will of course have to use measurements appropriate for your speakers. The price of the items listed below was correct at the time of writing this article.
| Total Time: | 14h |
| Total Cost: | £82.26 |
| Item | Details | Unit | Qty | Price Per Unit | Total Price |
| Planed Square Edge Timber | 44x44mm | 1m | 5 | £2.16 | £10.80 |
| Birch Plywood (BB/BB Grade) | 2440 x 1220 x 15mm | Piece | 1 | £50.00 | £50.00 |
| Countersunk Multipurpose Black Screws | 50mm x 3.5mm | Pack | 1 | £4.72 | £4.72 |
| Neoprene Sheet | 297 x 210 x 3mm | Piece | 1 | £3.00 | £3.00 |
| Felt Pads | ø20mm | Pack | 1 | £2.00 | £2.00 |
| Spray Paint | Black Matt | Can | 2 | £5.87 | £11.74 |
| £82.26 |
FINAL THOUGHTS ON HARBETH SPEAKER STANDS
I personally find it rather hard to assess a sound difference between stands with any level of confidence. The time difference between swaps certainly does not help, and there are a number of other factors which may come into play. After all, we are listening for differences that are at the borderline of perception – can one be sure that these are due to different stands and not due to one of the speakers being placed at a slightly different angle, or due to the listener sitting in a slightly different position? Not to mention biases that can skew our perception without us even realising…
In my experience, the most significant difference between the Harbeth speaker stands is not related to their construction, but rather to their height. The height affects the speakers’ proximity to the floor, as well as where our ears are in relation to the drive units. These two factors can have a serious and measurable impact on the frequencies that reach our ears. I’m not saying that there are no audible differences between different stand designs – I am simply saying that I don’t find them significant enough to get excited about… each to their own.
Completed: August 2018 | Published: October 2018


