TABLE OF CONTENTS
OVERVIEW
Being really impressed with the clarity and resolution of my newly purchased Yamaha NS1000 meant that the next logical step was to investigate ways improving the bottom end response; as this was the only thing that was bothering me with these speakers. Manufacturer’s specs show the frequency response from 40Hz. I have run some ‘near-field’ measurements (approx. 60mm from the diaphragm due to the driver grille) which resulted in -6dB at 40Hz. My goal was to get frequency response from around 30Hz with -6dB.
I’ve seen number of threads on various forums related to getting more bass from Yamaha NS1000, but I have not found anything appealing there. Couple of people reported good result from removing large amount of damping material but I have not had much success with this. Removing damping from behind the woofer slightly altered the bass sound but I would not say that it made it any deeper. Removing damping material decreases virtual enclosure volume, and therefore, purely from theoretical point of view, should result in less deep bass.
I also came across some photos, where a person built a set of subwoofers (one under each speakers), however, this was not the direction I wanted to go. Blending external subwoofers with speakers is not always easy and I simply did not fancy doing it.
I found T&S parameters of the Yamaha’s bass drivers on Troles Gravensen’s website, which indicated that the bass driver is quite ‘flexible’, in a sense that it can be used in a bass-reflex enclosure. I then measured T&S parameters of my own drivers and the results were consistent with the results published by Mr Gravensen. This encouraged me to experiment with different enclosure types and sizes. After simulating number of different options, I considered increasing enclosures’ volume but keeping them sealed. However, to get the bass response I was after, I’d have make 200 litres enclosures, and this was not the best option for these drivers. I decided that ported enclosure with volume between 70 and 110 litres will be the best option.
PLANNING & TESTING
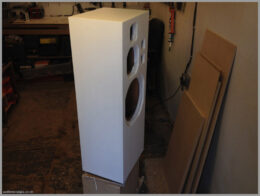
The original enclosures were about 45 to 50 litres in volume, which meant that I had to make larger enclosures. Usually, I would start from scratch, however, I was so impressed with built quality of Yamaha NS1000 that I decided to incorporate them into my design. The most logical option was to build enclosure extensions underneath the speakers and by doing so, convert them into floor-standers.
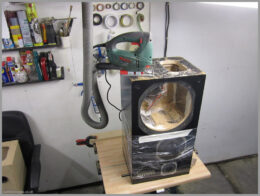
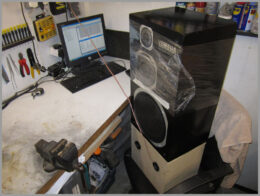
Before doing any ‘proper’ work, I cut out two holes at the bottom of one speaker and mocked-up an extension from spare pieces of chipboard. I measured bass driver’s impedance in the enclosure and tuned the port to the desired resonance frequency. Interestingly, the woofer’s ‘near-field’ measurement, apart from deeper bass extension, also shown a couple of decibels increase in the 60-110Hz range. Most likely, result of the increased enclosure size and lack of heavy mineral wool damping behind the woofer.
This did not put me off, as couple of decibels is a drop o water in the ocean, if you consider what happens to frequency response in our hardly optimised listening rooms… I then compared both speakers (original vs. extended) in mono.
The results were very encouraging. The bass was much deeper than in the original speaker and surprisingly, I did not perceive it as ‘slow’. Initially, I was slightly concerned that adding extra bass will affect my perception of midrange and treble clarity (it is quite common that we perceive speakers will less bass as more detailed). However, this was not the case with the Yamaha NS1000. Extending frequency response did not harm midrange or treble in any way. When two speakers were compared side by side, the extended one sounded like the original speaker in all aspects except the bass – it was much deeper.
Based on these very positive results, I decided to convert my NS1000 into floor-standers with a volume of 75 litres and resonance frequency of 30Hz.
ENCLOSURE BUILDING
Because my original Yamaha NS1000 enclosures were in pretty bad visual shape, I decided to sand all the paint off and glue 3mm thick MDF all around the enclosures, except from the backs, where the 10mm MDF would go (I am not going to give any precise measurements of the MDF panels here as these very much depend on how much material you are going to sand off from the original enclosure and how are you are going to join them together).
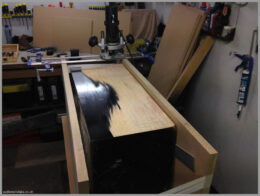
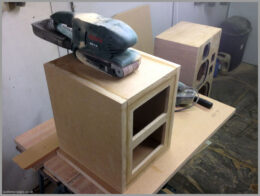
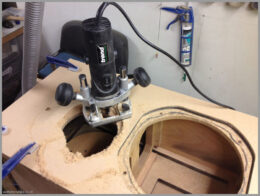
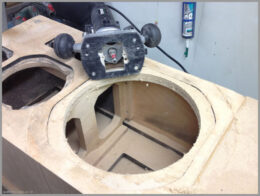
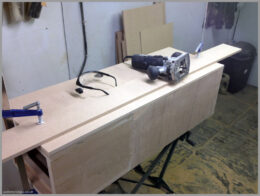
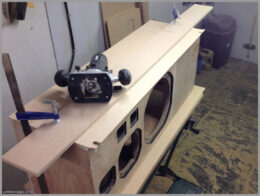
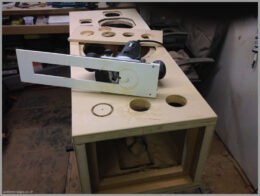
The work started form preparing original enclosures. Unfortunately mine were used and abused during their previous life, and as a result of multiple knocks, the side walls were not perfectly flat. I had to improvise and create rails (parallel to the side of the speaker), that I could slide my router on. This way, router bit removed the material only from the areas where there was an excess of it. Afterwards, the enclosures were sanded using belt sander and 40 grit sand paper. If I was going to apply finish directly onto existing enclosures I would have not used the belt sander. But, I was going to glue thin MDF panels around the speaker, so slightly uneven surface did not matter that much.
Plastic clips for holding grills were removed together with any black paint remaining in the holes, to ensure good filler adhesion. The black paint was also removed from any other areas where I knew I was going to apply glue (driver recessions, etc.).
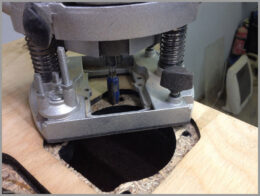
I used spare pieces of 6mm plywood and router with a trimming bit (one with ball bearing at the bottom) to make the following jigs:
– Jig for routing out holes at the bottom of enclosures
– Jig for routing out speaker terminal inner hole
– Jig for routing out speaker terminal recess.
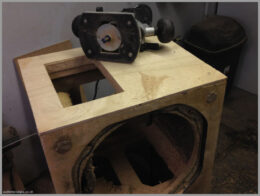
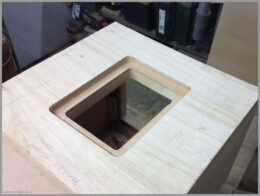
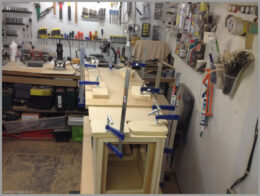
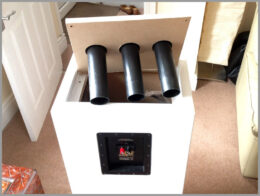
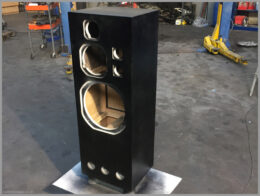
The bass extension box was made from 25mm thick MDF. Designed with removable bottom panel, hence the captive nuts and bolts visible on the photos. Extension box was glued and screwed together with original speaker. Any gaps were filled in using wood filler.
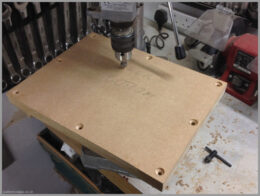
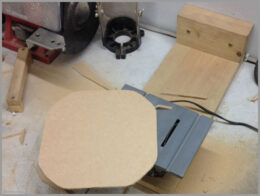
The trimming router bit was also used to cut out front panels speaker holes. Adding adding an extra 3mm to the front panel meant that I needed to create 3mm washers to raise the drivers and attenuators. The easiest way of making these (at least in my mind) was to use previously cut out front panels, and draw the appropriate shapes on a pieces of 3mm MDF. Once the shapes were drawn, they were cut out using jig-saw and miniature table saw. Not perfect but close enough. The shapes were then put into speakers and their center bits were routed out using the trimming bit. The speaker mounting holes were marked and drilled out using bench drill. Having all the washers ready, created perfect opportunity for cutting out drivers’, attenuators’ and speaker terminals’ seals.
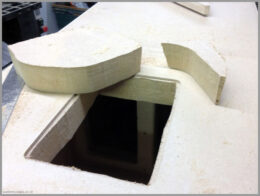
The speaker terminal holes on the back of the original enclosures were sealed with MDF & chipboard inserts. Afterwards, 10mm MDF panels were glued on the back of the speakers. Once dry, sides were trimmed using the trimming router bit. New speaker terminal holes were cut out at the bottom of the speakers using previously prepared jigs and standard router bit. 3mm MDF side panels were then glued to each speaker side and once dry, trimmed with the trimming router bit. The MDF panels were glued to the top of the speaker and trimmed in the same manner as other panels.
Finally, the front panels were ready to be glued on. This part was a little tricky as the speaker holes in the panels were already cut out, so they needed to be perfectly aligned with the holes on the actual enclosures. Once the glue dried, the sides were trimmed with the router.
In addition, router was used to slightly chamfer all the edges, making them look neat and much easier to paint.
Previously made, 3mm washers were glued into speakers’ holes and any gaps were filled in using wood filler. All of the open MDF edges were sanded using various grit sandpapers finishing with 600 grit.
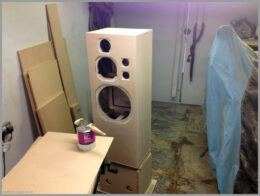
The Yamaha NS1000 enclosures were then primed using MDF primer, which sealed the rather ‘thirsty’ MDF.
Before routing out the bass-reflex holes I decided to double check if my simulations were correct by measuring speaker impedance with the appropriate port lengths in. Once happy that the tuning frequency is actually lower than I needed and that I can up it by making the ports shorter, I routed out the wholes in the speaker enclosures.
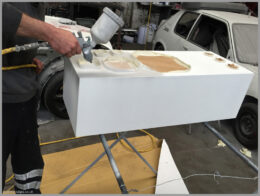
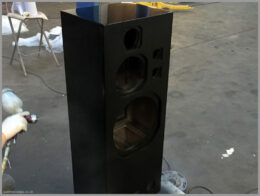
Enclosures were then taken to my friend’s garage, where couple coats of self-levelling filler were applied. These were followed by hours of sanding with wet and dry sandpaper. When relatively flat surface was achieved, thin layer of black base coat was applied. The enclosures were then lightly sanded to remove the thin black coat. By doing so, any imperfections like small dips became clearly visible. The imperfections were filled in and couple coats of black base layer were applied. Next, couple coats of clear lacquer were applied, to achieve the desired glossy piano finish. The new Yamaha NS1000 enclosures were then left to dry for couple of weeks, to ensure that the lacquer has hardened properly before polishing.
ENCLOSURE FINISHING
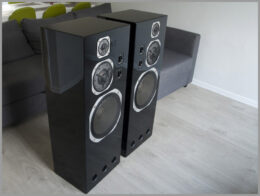
Polished enclosures were collected from my friend’s garage and taken to my workshop. All of the components were put in place and all of the connections were soldered. Final measurements were conducted to double check everything.
LIST OF COMPONENTS & PRICES
Table below shows list of parts together with prices, necessary to modify the Yamaha NS1000M cabbinets as described above. The prices of the items listed below were correct at the time of writing this article.
| Total Time: | 70h |
| Total Cost: | £344.35 |
| Item | Details | Unit | Qty | Price Per Unit | Total Price |
| MDF For Bases | 2440 x 1220 x 25mm | Board | 1 | £31.00 | £31.00 |
| MDF For Outers | 1220 x 1218 x 3mm | Board | 2 | £8.90 | £17.80 |
| Wicks MDF Primer | 750ml | Can | 1 | £12.99 | £12.99 |
| Ronseal Wood Filler | 50ml | Can | 1 | £3.66 | £3.66 |
| PVA Wood Adhesive | 1000ml | Can | 2 | £8.80 | £17.60 |
| Bass Reflex Ports | ø50mm x 185mm | Piece | 6 | £3.00 | £18.00 |
| Allen Bolts | M6 x 60mm | Pack | 1 | £4.09 | £4.09 |
| Captive Nuts | M6 x 12.3mm | Pack | 2 | £1.23 | £2.46 |
| Brass Flat Washers | M6 x 9mm | Pack | 1 | £2.85 | £2.85 |
| Rubber Feet | ø19mm x 10mm | Pack | 1 | £4.50 | £4.50 |
| Monacor MDM-3 Damping | 630 x 330 x 35mm | Sheet | 14 | £2.10 | £29.40 |
| Spray Painting | – | Service | 1 | £200.00 | £200.00 |
| £344.35 |
FINAL THOUGHTS
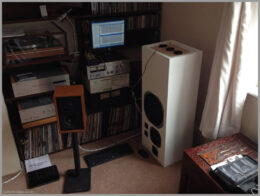
I managed to preserve the original character of the Yamaha NS1000 and add extra ‘oomph’ at the bottom end. Perhaps details in bass are ever so slightly harder to pick up, but it is borderline of perception – overall, I am happy with the results. If I was to criticise anything it would be their look. I really liked the look of the monitors on the stands and I don’t think these floor standers look nowhere near as good.
Completed: October 2015 | Published: December 2015


